Blog

  • REVIEW OF TEACHING PRACTICE: HOW TO PLAN DYNAMIC RISK ASSESSMENT FOR OFFSITE INSTALL – an imagined email

    Project: Southwark Park Gallery install

    Activity: Final Show Risk Assessment

    Description: Final dynamic risk assessment of the gallery space to ensure public opening to planned schedule

    Hello all. Sorry I will be away next week for the last two days of install at the Southwark Park Gallery Show. We will need to do some final checks to make sure the show can open to the public as planned. These are all the things that need to be done to get us to a ‘safe to open’ stage, in the timescale we have. I’ve written it as a rough method statement, to be followed in order.

    Steps in order:

    Day 1

    1. A final check offlagged work: We received and reviewed student written paper risk assessments prior to the install, and flagged certain works as requiring additional attention during install due to complicated install plans or due to yellow or orange residual risks after mitigations were put in place on the written risk assessment. So, firstly, check in with these students and insure that if their mitigations are not yet in place, that they have a plan for them to be in place by the end of today. For these complex installs, we cannot have last minute, untested, mitigations coming in on the final day of install.
      1. Make note of any works that will need a further inspection tomorrow, for example for an agreed mitigation being missing, and convey to the students that if it is not there by tomorrow AM the work must be withdrawn. 
    2. Do a final check of all work using mains electricity: Visually inspect all cabling used for any work plugged into mains electricity – any nicks or damage to any part of the cabe and is needs to be replaced. Ensure any power adaptors or extension leads that are used have their up-to-date PAT test sticker, or receipt of purchase. We cannot have unverified electoral equipment in the space during public opening. All student electrical equipment should have been PAT tested on the booked dates prior to the install, but over the course of the install equipment may have been swapped out or become damaged so an additional physical inspection is required.
      1. Again, make a note of any work that needs specific further inspection tomorrow, and convey this to the student. 
    3. Hanging points / suspended work: Inspect all suspended work to make sure it is using it’s pre-agreed hanging points. Students can sometimes add additional hanging points that are not securely rated to the ones in that are already in their plan, for example from electrical ducting in the ceiling. If you are unsure if a hanging point was pre-agreed, you can check with the Gallery team, as they will know the safe working loads of the zones of the install space.
      1. Again, make a note of any work that needs specific further inspection tomorrow, and convey this to the student.
    4. Wobble Test / Stage Weights: Inspect any freestanding work that needs to be weighted down, for example isosceles frames or freestanding projections screens. Make sure that any agreed mitigating weights for flagged works are in place, and give any freestanding work a wobble to see how securely it is standing, and not at risk of partially or fully falling. Make sure that any students who’s work needs additional weighting are aware they will need to get weights, either purchased or from the CLS, in order for the work to be shown. 
    5. Wall Fall Test: Inspect any wall mounted work that looks loose – for example hung with command strips on an uneven surface, with an uneven drop hang, or where the nail is not perpendicular to the wall. If any work looks unsafe or unsecured, advise the student on the necessity of a new hanging solution. 
    6. Check in with tutors: Discuss any unresolved issues that have arisen when testing and flagging issues earlier in the day with the student’s relevant tutor. They will know more about the student’s practice, circumstance, temperament etc. and will be able to advise on an approach or assist with enforcing. Each student is different and will respond best to different approaches; their tutor will likely be the quickest way to find out what this best approach is.
    7. Write And Share A Working At Height List And Order: Share this with the relevant students and tutors and ensure they understand that it is a list of priority, that will be limited by time and human resource. 

    Day 2

    1. Final Working At Height: First thing, the final working at height list from yesterday. Do this first so as to allow you to easiest restrict access to the working area. Ensure this doesn’t expand in scope beyond the list, otherwise it will spiral, take all day, and prevent the show form opening.
    2. Check in with tutors again: Follow up with tutors on yesterday’s check in and if possible make an arrangement to go round each course’s work with the relevant tutors of that course, doing the final sign off of the work. 
    3. Check In On Noted Works From Yesterday: A quick check to make sure any changes requested (new electrics, new mitigations, new mountings etc.) are in place or that the students and/or relevant tutors have a plan in place. 
    4. Access routes: Go round all spaces a tape measure, ensuring minimum 1.2m access routes to all fire escape routes, as this is the legal minimum required. Additionally, ensure wherever possible that there are no cable runs across access routes to fire escapes, as these can cause a trip hazard in an emergency.
    5. Final Cable Run Checks: Make sure any cable runs that are still in pace are secured in place with cable covers or duct taping done by our team or the gallery team. If you are unsure of what materials can be used to secure cables in a space check with the Gallery team.
    6. Repeat steps 2 and 3 in turn: Go through each course and check in, then do subsequent loops of the install space until no more work needs checking.
    7. Sign Off With Gallery Team: Ensure the show looks good to open from the SLG team’s perspective – they are the final arbiters of the space so the final say-so on everything is theirs. 
    8. Congratulate Students: A small but important step. Make sure the students feel proud of their work and their perseverance with the challenges of an offsite install!
  • REFLECTIVE BLOG 2 – FEEDBACK

    I have been thinking about feedback, especially in the context of of a multicultural institution like UAL. This lead me to read Sadler’s Beyond feedback: developing student capability

    in complex appraisal. Sadler discusses in depth complexities around giving and receiving actionable feedback. For example, the issues around written feedback as a form of asynchronous communication, where the form and tone of the response must be second guessed in advance to ensure it is taken in by the student rather than rejected. Sadler’s idea of the fundamental issue of the knowledge gap between marking staff and students was interesting, though I would extend the concept beyond specialist subject knowledge to wider cultural knowledge. For example, I remember explaining to a course mate from another country while doing my masters how British university marking works, and how they might translate what to them looked like a failing mark purely based on its’ numerical value. 

    Sadler identifies peer assessment as a very efficient way to generate actionable feedback, describing a model where students are given a framework to mark and be marked by each other consisting of four wide ranging questions on the success of the execution of the work. This peer assessment model chimed with my experience of the microteaching exercise, if we treat the session as a piece of work. The conclusions that were drawn by my peers were immediately, concretely actionable. Given my experience of the success of peer assessment, I would want to use this model in my work with students – for example accompanying me when I check over installed work for safety, and turning it into a kind of rolling discursive seminar. Of course, this would be much less time efficient as a model – it would need to be built in to an exhibition from the start. 

    References

    Royce Sadler, D. ‘Beyond Feedback: Developing Student Capability in Complex Appraisal’. Assessment & Evaluation in Higher Education, 2010, 535–50.

  • MICROTEACHING REFLECTION

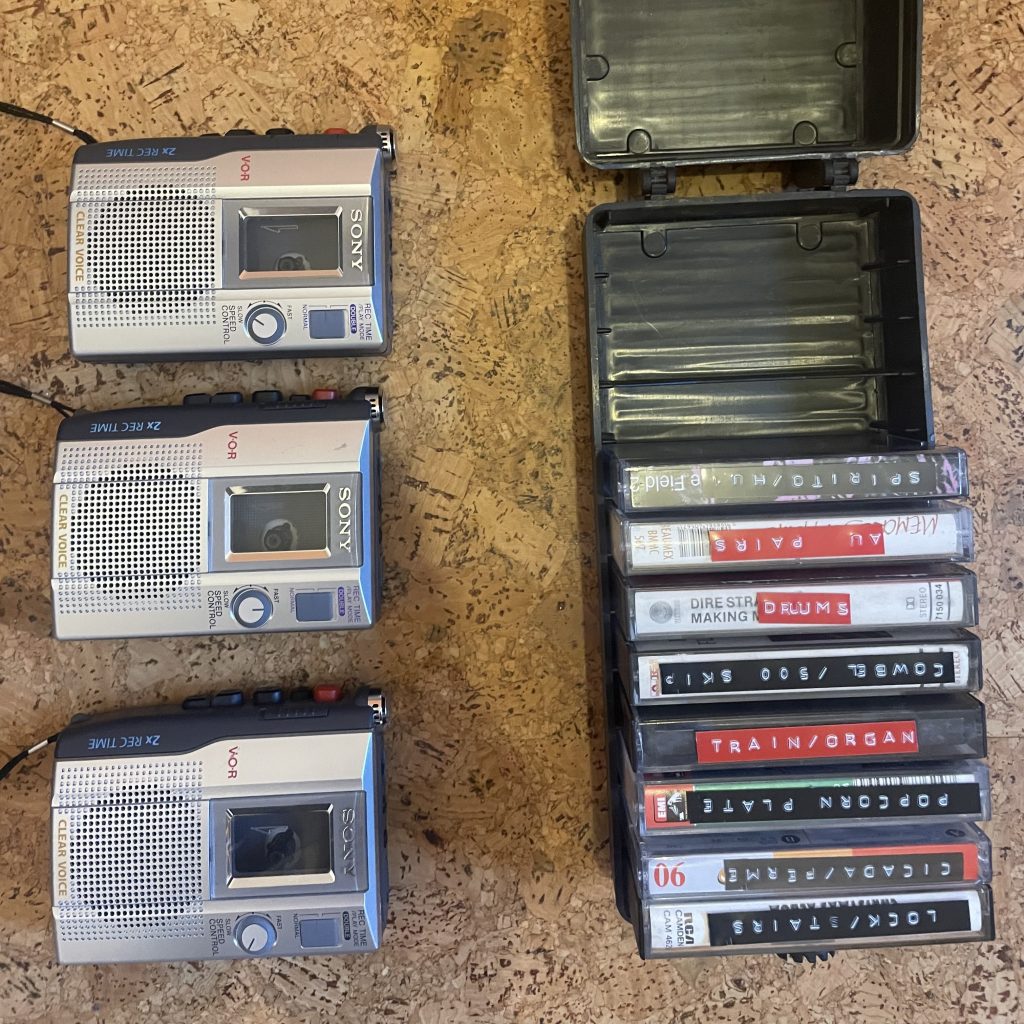
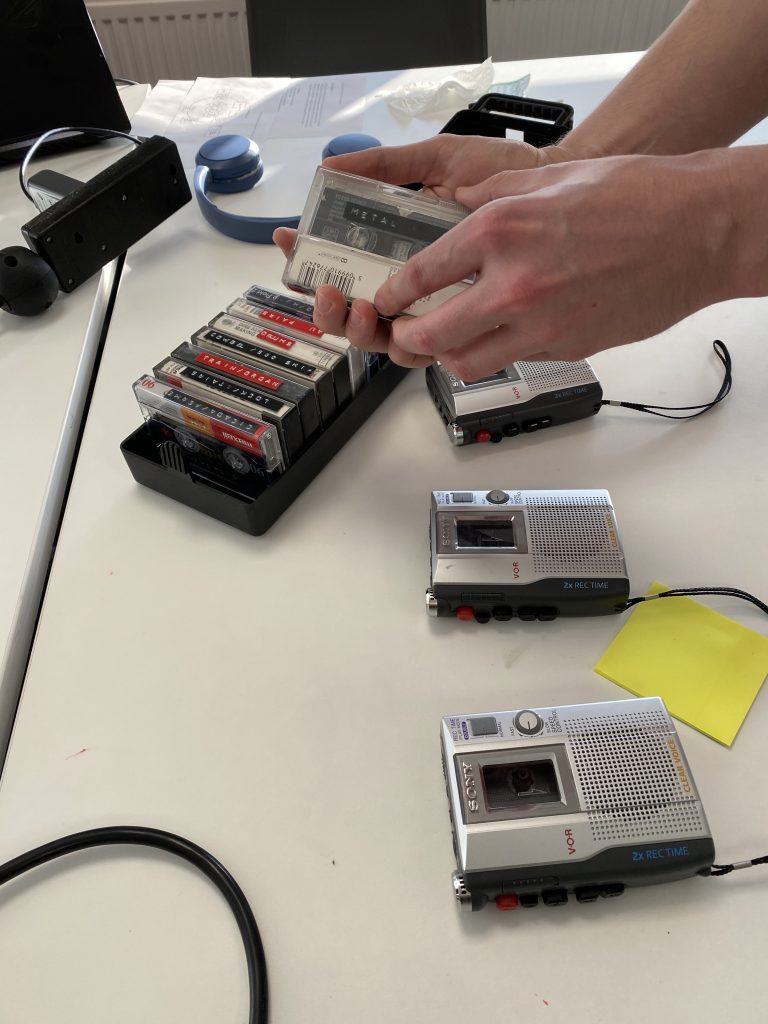
    My microteaching session was entitled ‘An introduction to embodied knowledge: How do the tools we use influence the work we make, both as artists and a workers in a wider sense?’ My goal was to do a very small intro to the idea of embodied knowledge, given the scope of the time we had, grounding the discussion in my own art practice of using tape. This was to be a jumping off point only; I wanted the meat of the session to be a discussion around tools and embodied knowledge. To emphasise this discursive aspect, I had no visual element apart from the tapes and machines I asked the group to interact with.

    Tape players and machines in preparation

    Tape players and machines in session use

    I had a written plan to keep to, see below:

    In the session itself, the primary challenge was the fire alarm going off halfway though, during our ‘have a go’ section of the plan. This fifty minute gap in the middle threw the flow of the session off a bit, and maybe meant our end concluding section was slightly disjointed from the opening thesis. However, the discursive section went well, and as I had hoped the range of practices and experiences across the group led to a wide ranging conversation around tools and materiality – discussing physical tools versus digital tools, and how students perceive material practices, for example. This was reflected in the feedback I received from my peers on the session, which consistently praised the discussion and my inclusive manner of leading it as a strong element.

    I also received some very useful, practical advice on how to improve the session from my peers. These included: having a structured task to work towards, for example me conducting a performance with the machines; bringing in blank tape so the group could record and experiment with their own sounds; me giving a full performance or demonstration, and showing some examples of the lineage and history of tape practice. 

    Reflecting on my mciroteaching, I felt that the feedback I received was invaluable, as it identified easy to implement practical advice for ‘tape’ element of the session. My deep familiarity with the medium and its artistic history meant that what I had planned as a neutral, context-free engagement with tools was missing key context of what was possible with, and why one would use, this superseded medium for those without my experience. 

    The small-group discursive section, always my intended primary element, went as much to plan as it could, and I only received positive feedback on this. In a way that is a challenge, as this for me felt like the primary site of learning. In the future, I may want to diverge the two parts, and almost do more sound-focused demonstration work and a more theoretical seminar model session. For example, I could have introduced Bulley & Sahin’s Practice Research as our jumping off point to the same discussion around embodied knowledge, and it may have been a equally valuable session. Though, it would have been less fun and engaging for the participants; this is especially something to consider if adapting this model to work with students. 

  • REFLECTIVE BLOG 1 – FIRST STEPS

    In our first session, by chance I ended up sitting with technical staff from other UAL colleges, with a range of specialisms and scopes of work. We had all undertaken the same reading, Sams’ How do art and design technicians conceive of their role in higher education? This was a useful jumping off point for a wide ranging conversation about the non-standardised approach to technical & support work at UAL, for example how colleagues on older contracts are sometimes entitled to research budgets and time off the attend gallery openings – contractual elements not available to newer colleagues. We also discussed the unclear and unevenly applied regulations about what support work counts as ‘teaching’, and the frequent frustration around this imperceptible but firmly enforced tipping point. We also discussed my reading of a gap in Sams’ writing; to me, the majority of the issues or frustrations she outlines are commonalities with most knowledge based work in the uk, those of a general alienation from one’s labour, and increasing responsibility/seniority reducing the ratio of time spent on the fulfilling parts of the role – in this case directly helping students.

    Additionally, Sams’ research methodology was interesting, especially the use of photography as a conversational object. By interacting with a photograph, the technicians were able to relate to their own work or employment as an outside object, gaining an additional, potentially more objective angle, on their role within the university. I intend to use this model in my forthcoming microteaching session – at this stage I’m thinking of looking at tools, and thinking about the commonalities and divergences in the primary tools we use to produce work, building on my on experience researching embodied performance practices and finding out how applicable that model is to other colleagues’ work and self-conception as practitioners.